
In short
- With a 3D printer the workshop makes the device itself: corsets, AFOs, sockets, insoles, cushions and seating, with no plaster positive and no thermoforming.
- The most used materials are polypropylene (PP), TPU and PETG. A corset takes about 6-10 hours to print: it prints overnight and is finished in the morning.
- An adult corset needs a large build volume, reliable filament drying and automatic resume after a power cut.
3D printing has entered orthopedic workshops as an alternative to plaster and thermoforming. This guide explains what can be printed today, with which materials, how long it takes and what you really need to do it every day, not just as a test.
1. What an orthopedic workshop prints today
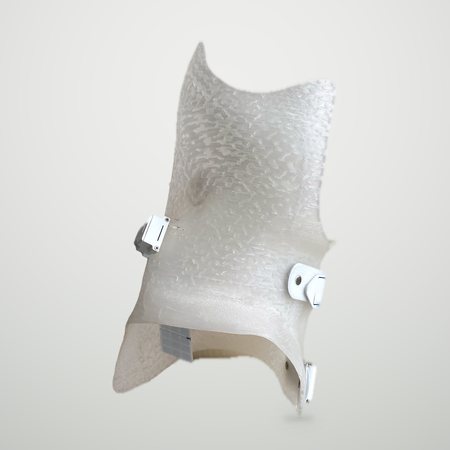
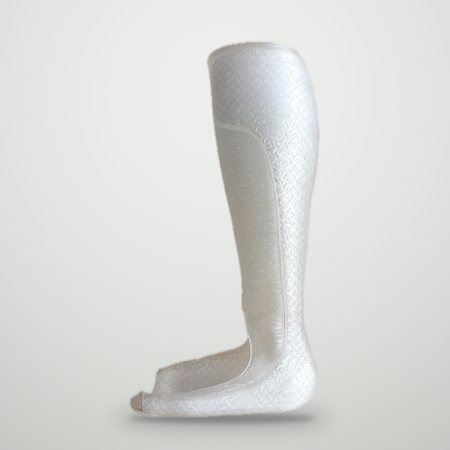
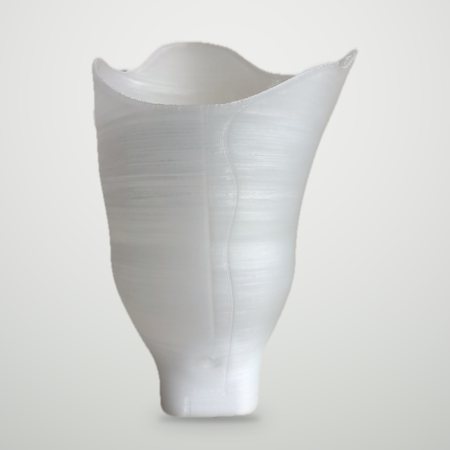
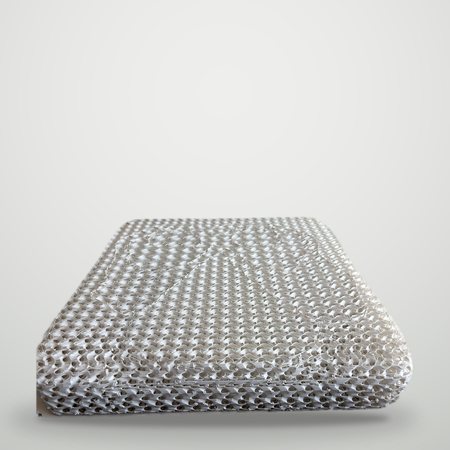
The printer does not make a model to work on: it builds the finished device, layer by layer, from the patient’s file. The devices workshops print most often are:
- corsets and body jackets, including for scoliosis, with different thicknesses in pressure and relief areas;
- AFOs and other lower-limb orthoses;
- prosthetic sockets, including test sockets;
- insoles, rigid or soft depending on the material;
- cushions and seating for custom positioning systems;
- cranial helmets.
2. From scan to device
The workflow is the same for every device:
- Scan the patient with a 3D scanner instead of taking a plaster cast.
- Model the shape on the computer with the CAD software the workshop already uses: corrections, pressure and relief areas, trim lines.
- Prepare the print: the STL file goes into the slicer, which sets wall thickness, infill and nozzle path. With Helios HS you use our slicer, with settings ready for orthopedic devices.
- Print: the machine works on its own, overnight too.
- Finish: remove the supports, trim the edges, fit closures and padding.
Compared with the traditional process, the longest and most manual part disappears: no positive to prepare, no oven, no thermoforming. And every patient stays a file: to remake a corset, you just print it again.
3. Materials: PP, TPU and PETG
The material depends on the device. The three most used in orthopedics are:
| Material | Properties | Used for |
|---|---|---|
| PP (polypropylene) | stiff yet flexible, light, the same material as thermoforming sheets | corsets, AFOs, sockets |
| TPU | flexible, cushioning, printable in different hardnesses | insoles, cushions, seating, soft parts |
| PETG | rigid, stable, easy to print | models, trials, supports and technical parts |
With several extruders you can combine two materials in the same print, for example a PP structure with TPU areas. Helios HS takes up to four extruders and changes material by itself.
Filament absorbs moisture, and damp filament prints badly. So the printer should keep the spools dry: Helios HS holds up to four spools with a built-in dryer.
4. Times and workflow
3D printing keeps the machine busy longer than milling, but frees up people. On Helios HS a corset takes about 6-10 hours: in practice the print is prepared in the afternoon, the machine works overnight and in the morning the technician finds the device ready to finish.
What changes in the workshop:
- the technician’s time moves from thermoforming to modelling and finishing;
- the machine also works outside working hours, with no operator;
- devices are planned day by day, like a print queue.
A ten-hour print has to survive a power cut: automatic resume after a blackout is a feature to check before buying.
Does it pay off in your workshop? Calculate your savings or book a free demo.
5. 3D printing or milling?
They are not mutually exclusive. Milling produces the polyurethane positive for thermoforming in a few minutes, and it is the natural route for a workshop that already has an oven, a thermoforming machine and experienced technicians. 3D printing removes thermoforming and produces the device directly, but keeps the machine busy for hours.
Many workshops end up using both. The full comparison, with costs, space and software, is in the guide to choosing between a CNC milling machine and a 3D printer, and milling is covered in the guide to CNC machines for orthopedics.
6. What to look for in a printer for orthopedics
- Build volume. An adult corset is printed in one piece: the size has to allow it. Helios HS prints up to 600 × 600 × 800 mm.
- Time for a real device. What matters is how long a corset or an insole takes, not the top speed on the data sheet.
- Open materials. Check that you can use filaments from different manufacturers, without restrictions.
- Extruders and drying. Several extruders to combine materials, spools kept dry.
- Resume after a power cut. Essential for overnight prints.
- Slicer and profiles. Ask how much manual work each print preparation takes and whether there are ready profiles for orthopedic devices.
- Training and support. Who helps you in the first months, and how quickly they answer if the machine stops. Our training takes one or two days and our support answers the same day.
7. Frequently asked questions
Do I need to change my CAD software?
No. The printer works with STL files, which any orthopedic modelling software exports: the workshop keeps the software it already knows.
Is a printed corset different from a thermoformed one?
The material can be the same, polypropylene, but printing lets you vary the thickness point by point and build openings and reinforcements into the model. Published studies have described printed spinal orthoses that were thinner and lighter than traditional ones made for the same patients.
How much does it cost to print a device?
It depends on the material, the size and the machine time. The cost should be compared with today’s: plaster, sheets, hours of thermoforming, outsourced parts. The savings calculator does the maths with your workshop’s figures.
Can I try before buying?
Yes. In our demo area in Navacchio (Italy) you see Helios HS at work, and we can run a test print with your files, by video call too.
Want to see a printed corset for real?
Send us one of your files or tell us which devices you make: we will show you Helios HS at work and arrange a test print.